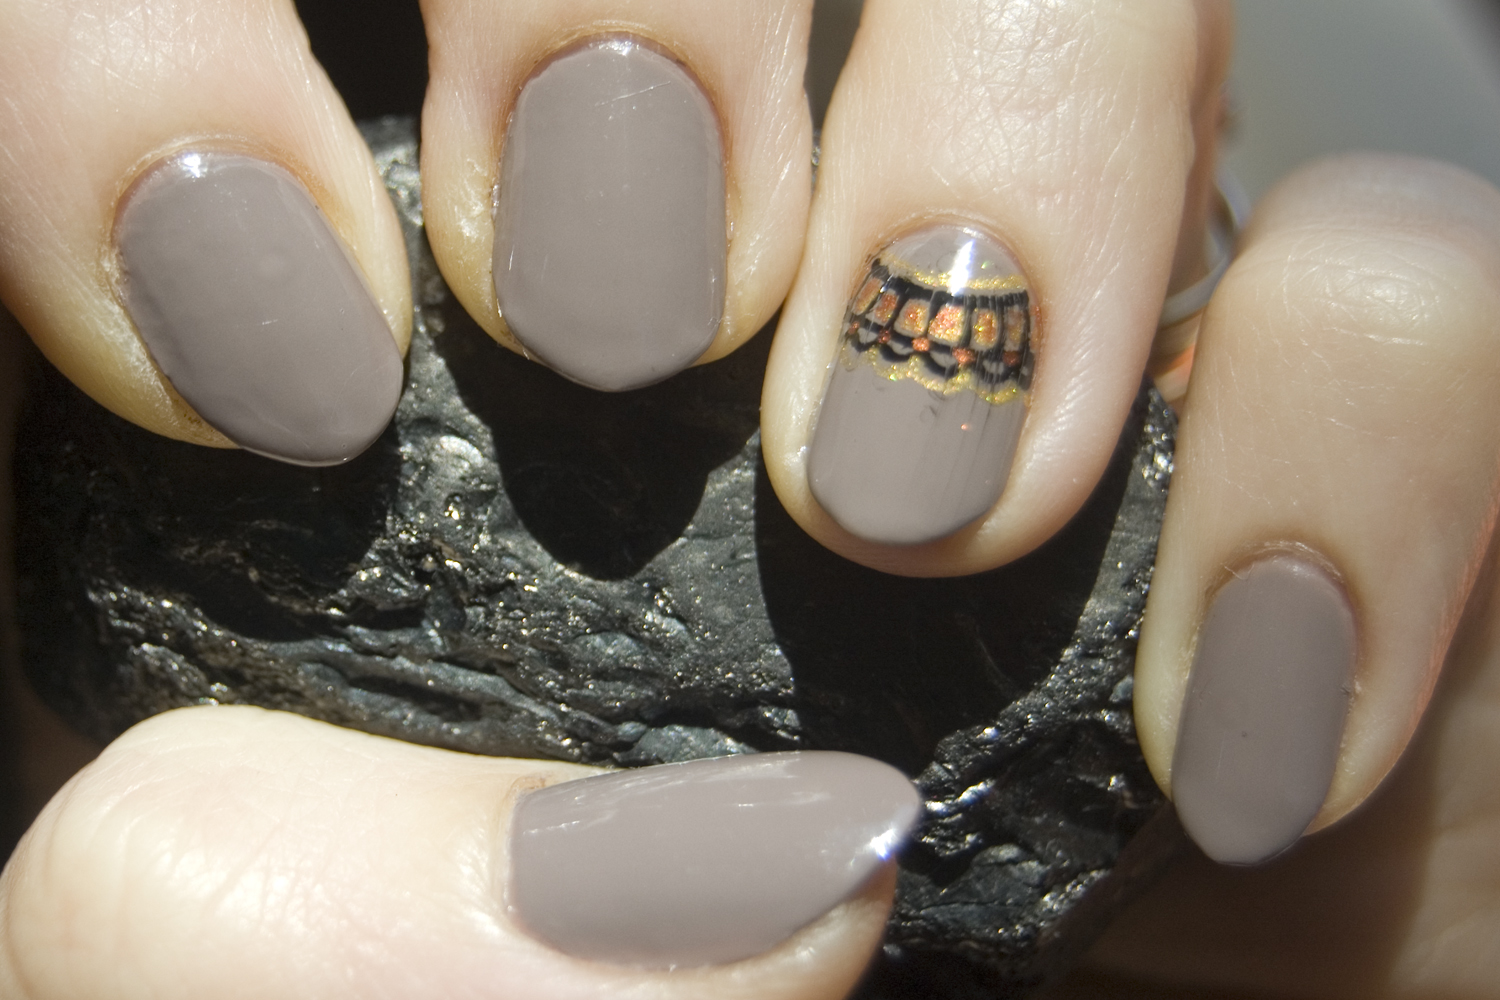
Nails by Kayla Shevonne is holding a nail art contest and I, like a ninny, have waited until the very last minute to post my entry even though I finished and photographed it weeks ago. The theme of this contest is Indie brand polishes. Everything, or nearly everything, used has to be a polish made by an independent nail polish brand.
In order from pinkie to thumb I used: Chromatological Constructs (CC) Kashmiri Namkeen Chai, CC Chough, Nail Venturous Lacquers Granite, CC Kashmiri Namkeen Chai, CC Chough.
On the pinkie and index nails I did a gradient using CC Bai Hao (Oriental Beauty). On the middle nails I gradiented with CC Chough.
I then did a glitter gradient on the pinkie and index nails with Sonoma Nail Art Clockwork. I used CC Bai Hao to create the lace patterns and the design on the middle nail as well.
With a toothpick I placed individual glitters from Sonoma Clockwork onto the lace patterns.
Chromatological Constructs is a line I have been working on myself over the last six months. Chough is a polish from the Corvus collection. Bai Hao and Kashmiri Namkeen Chai are from the Camelia Sinensis collection. These polishes are not for sale yet but one of my goals this summer is to get the materials I need in bulk to be able to produce these for sale.
Showing posts with label polish. Show all posts
Tuesday, April 30, 2013
Saturday, December 1, 2012
I've got the blues
Julie G Dance in the Dark gives me the blues. Why? Because it's blue.
Now many of you may not think that's such a bad thing. Honestly I wouldn't think it a bad thing either except that I thought I was getting a purple polish when I bought it. Really, it appeared to be a blue-leaning purple in the store but when I started applying it all I got was blue. Blue blue BLUE.
I suppose it's not a bad blue but it wasn't what I was expecting at all :(
That isn't my camera turning it blue. It really is a deep, vibrant blue. This is two coats, taken in full sun.
Obviously I wasn't happy with with the color so I topped it with Essie Shine of the Times.
Sparkles are usually a sure-fire way to cheer up :)
Now many of you may not think that's such a bad thing. Honestly I wouldn't think it a bad thing either except that I thought I was getting a purple polish when I bought it. Really, it appeared to be a blue-leaning purple in the store but when I started applying it all I got was blue. Blue blue BLUE.
I suppose it's not a bad blue but it wasn't what I was expecting at all :(
That isn't my camera turning it blue. It really is a deep, vibrant blue. This is two coats, taken in full sun.
Obviously I wasn't happy with with the color so I topped it with Essie Shine of the Times.
Sparkles are usually a sure-fire way to cheer up :)
Wednesday, November 21, 2012
My First try with Acrylic Inks
I mentioned with my first Halloween mani post that I had bought some acrylic inks to use for nail art. Well I thought I'd show you my first attempt with them. I started with OPI Berlin There Done That (two coats plus top coat):
I used black, gold, and copper inks for my design. One thing about the shimmery inks like the gold and copper is that they are quite sheer and show up better if used over a darker color. Layering them or using a bit more of the ink works well also though, as you can see I found out the hard way, it takes longer to dry that way.
Oh well, life is a learning experience. Now I know to let the ink dry thoroughly and have more top coat on the brush.
Another note about acrylic inks: you have to wait until your mani is COMPLETELY dry or the calligraphy nib will etch right through or catch on the polish and won't distribute the ink properly. This makes it the perfect way to change up a day or two-day-old mani.
Thursday, November 8, 2012
NO H8 November 8
We've all been there to some degree or other.
The kid on the bus or the playground that pushed you around, the name calling when you had to get glasses or braces, because you were too short or too tall, or just because you didn't look like everyone else. Bullying isn't just something relegated to childhood either, it happens to adults too and especially on the internet where the lack of face to face contact gives people a sense of anonymity and disconnection from the people on the other end of the connection.
Bullying is not funny. It is not cool. It is not right. And more importantly, it is not okay.
Most of us are, thankfully, residents of countries that support tolerance and many of our families have settled in these places simply for that reason. Generations later, it is our responsibility to perpetuate that message of tolerance across our new social platforms, including the internet.
As members of the nail polish blogging community, we all share a love of beauty, color, and lacquer. Other than that, we are remarkably different: from our race to our religion to our hair color...even to our polish application techniques. To marginalize anyone because of those differences is completely unacceptable and today I take a stand against that. I refuse to allow other people's view of "normal" dictate how I behave, believe, and blog.
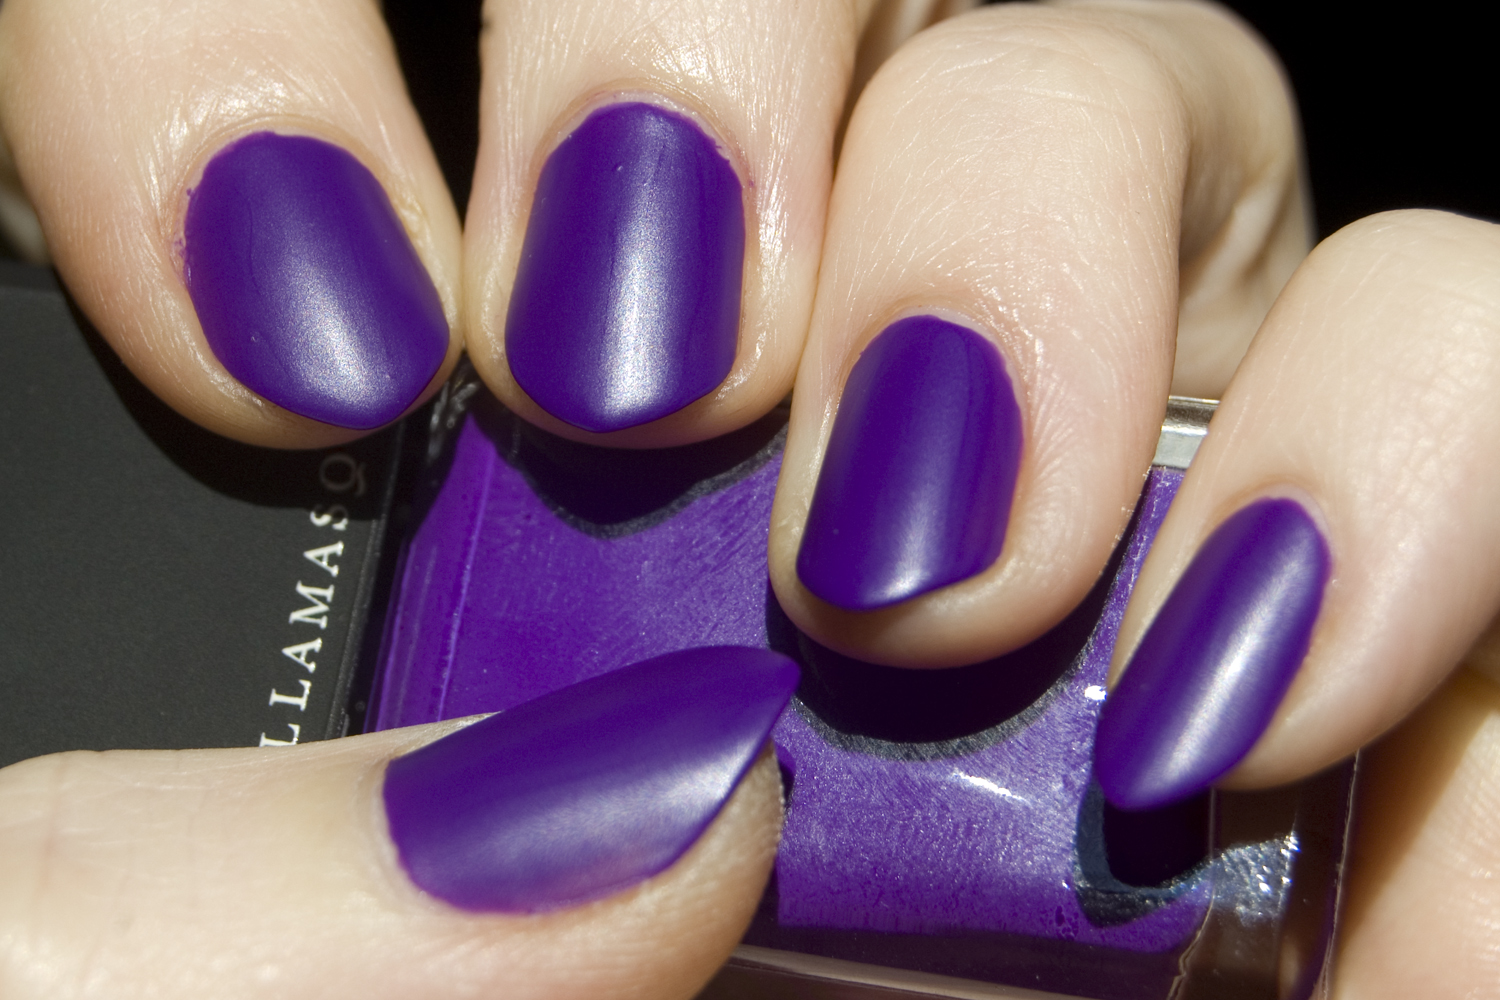
In solidarity with a multitude of bloggers linked below, my purple manicure represents my proud commitment to the No H8 movement. Today, November 8, I dedicate my post to ending bullying of any kind and to encouraging diversity and imperfection among our colorful community.
Most of us are, thankfully, residents of countries that support tolerance and many of our families have settled in these places simply for that reason. Generations later, it is our responsibility to perpetuate that message of tolerance across our new social platforms, including the internet.
As members of the nail polish blogging community, we all share a love of beauty, color, and lacquer. Other than that, we are remarkably different: from our race to our religion to our hair color...even to our polish application techniques. To marginalize anyone because of those differences is completely unacceptable and today I take a stand against that. I refuse to allow other people's view of "normal" dictate how I behave, believe, and blog.
In solidarity with a multitude of bloggers linked below, my purple manicure represents my proud commitment to the No H8 movement. Today, November 8, I dedicate my post to ending bullying of any kind and to encouraging diversity and imperfection among our colorful community.
For today's mani I chose Illamasqua Prosperity, one of the new Rubber Brights polishes. My decision to use an Illamasqua polish was influenced by their work with the Sophie Lancaster Foundation.
Our lives are like threads on a giant loom, what happens to one person can influence many people, and so I used one of my hand-mixed polishes, Ancient Pu'erh, to represent this connection in my nail design.
Remember, just because someone is different or doesn't have the same skills to the same degree as you it doesn't give anyone the right to put them down or bully them for those differences.
Wednesday, October 31, 2012
Queen of Hearts
I am starting this post off by stating just how much I love the Alice in Wonderland directed by Tim Burton. In fact I just got done watching it again <3
For this mani I started off with one of OPI's newest Designer Series polishes, DS Indulgence. I absolutely love the golden sparkle in this polish. It is so unbelievably jewel-like and pictures do not do it any justice whatsoever.
If you are wondering why you cannot see my pinky nail here it is because I stamped on it and then realized that I hadn't taken swatch photos yet. Silly me. Here is a photo of the first layer of stamping on my nails done with Wet'n'Wild Black Creme and Mash plate 12.
I then stamped with Cheeky plate CH3 in Black Creme on my ring finger and my franken Sugar & Spice on my index and middle fingers as well as my thumb. I then used Sugar & Spice and Mash plate 19 on my pinkies and used Sally Hansen XtremeWear White On and a striping brush to put a line delineating the stamped/non-stamped portions of the three nails with partial stamping.
I had the hardest time getting my extra-large stamper to pick up those blasted hearts. I ended up having to go back to my original stamper in order to get the polish to transfer.
For this mani I started off with one of OPI's newest Designer Series polishes, DS Indulgence. I absolutely love the golden sparkle in this polish. It is so unbelievably jewel-like and pictures do not do it any justice whatsoever.
If you are wondering why you cannot see my pinky nail here it is because I stamped on it and then realized that I hadn't taken swatch photos yet. Silly me. Here is a photo of the first layer of stamping on my nails done with Wet'n'Wild Black Creme and Mash plate 12.
I then stamped with Cheeky plate CH3 in Black Creme on my ring finger and my franken Sugar & Spice on my index and middle fingers as well as my thumb. I then used Sugar & Spice and Mash plate 19 on my pinkies and used Sally Hansen XtremeWear White On and a striping brush to put a line delineating the stamped/non-stamped portions of the three nails with partial stamping.
I had the hardest time getting my extra-large stamper to pick up those blasted hearts. I ended up having to go back to my original stamper in order to get the polish to transfer.
Labels:
franken,
Halloween,
nail art,
OPI,
polish,
Sally Hansen,
stamping,
Wet 'n' Wild
Nurse! I need a Doctor!
I had a LOT of fun with this manicure. I also got to test the school-glue-as-peel-off-basecoat method since I knew I was going to be using glitter. Huzzah for planning!
I used one coat of glue on my nails and let it dry completely before applying my regular base coat and two coats of Essie Skirting the Issue. Which, I might mention is THE perfect blood red jelly for Halloween manicures. I am so glad I bought this!
Then I used Orly Right Amount of Evil and topped with another coat of Skirting the Issue and top-coated with OTD top coat.
I waited about twelve hours before moving on to the next part of the manicure just to make sure everything was dry and set. With a toothpick and a cuticle pusher I then went to work peeling of the polish on my ring finger nails. I know, I know, I could have made everything simpler if I'd just skipped over those nails in the first place but I hadn't thought about the next little touch until I was already started. And besides, it gave me an excuse to test the glue-as-base-coat without ruining the entire mani.
I used one coat of glue on my nails and let it dry completely before applying my regular base coat and two coats of Essie Skirting the Issue. Which, I might mention is THE perfect blood red jelly for Halloween manicures. I am so glad I bought this!
Then I used Orly Right Amount of Evil and topped with another coat of Skirting the Issue and top-coated with OTD top coat.
I waited about twelve hours before moving on to the next part of the manicure just to make sure everything was dry and set. With a toothpick and a cuticle pusher I then went to work peeling of the polish on my ring finger nails. I know, I know, I could have made everything simpler if I'd just skipped over those nails in the first place but I hadn't thought about the next little touch until I was already started. And besides, it gave me an excuse to test the glue-as-base-coat without ruining the entire mani.
No nail damage!
All peeled off!
Peeling it off did take nearly as long as if I had just stuck my finger in acetone to soak the stuff off but it certainly resulted in less nail damage! Perhaps it would have been easier if I'd used two coats of glue.
After cleaning off the residual polish with remover I used my regular base coat and Sally Hansen Complete Salon Manicure Green Tea on my newly-bare nails. I decided to try out another glue tip and covered the area of my finger around my nails with glue in preparation for a bit of splatter. I did mention that Skirting the Issue is THE perfect blood red, right?
Prepped for splatter
Messy messy messy
Left hand
Right hand
So now that my family officially thinks I'm strange . . . Oh who am I kidding, they already knew it! LOL! And yes, that is a syringe pen. I picked it up for a dollar at the Spirit Halloween store. I kind of smudged the red splatter on my left hand with the top coat but I think I like it better that way honestly. It makes it look more real.
Spiderweb French
I think I might like creating spiderwebs a bit too much! LOL! I got the idea for this mani from a post on Mini Nail Blog. My nails aren't as long as hers but they are nearly the same shape so I thought I'd give it a try. I started with two coats of Sally Hansen InstaDry Orange Splash.
I then used Cult nails Deal With It to create an uneven french tip.
And with a striper brush I used China Glaze Urban Night to create the spider webs.
I then used Cult nails Deal With It to create an uneven french tip.
And with a striper brush I used China Glaze Urban Night to create the spider webs.
Right hand.
Left hand.
Monday, October 29, 2012
Caught in the Spiderwebs
Ok, it's about time I kick my butt back into gear when it comes to updating this blog. I've been sitting around since my work season ended enjoying the feeling of not having to do a darn thing other than take care of my kids. I have also been enjoying being able to finally do nail art without worrying about having it completely wrecked the next day. Whoohooo! So I've been busy with that and now I need to post what I've been playing around with.
First up I decided to celebrate my freedom by using a neon I bought in the middle of the summer but couldn't wear to work. Orly Hot Shot is a coral neon. It's about halfway between magenta and orange. I used two coats of Hot Shot and one of OTD top coat for the following photos:
I then used one of my frankens, a dark brown with holo glitter called Stage Whisper, to do a funky french and then sketched spiderwebs with white acrylic ink:
First up I decided to celebrate my freedom by using a neon I bought in the middle of the summer but couldn't wear to work. Orly Hot Shot is a coral neon. It's about halfway between magenta and orange. I used two coats of Hot Shot and one of OTD top coat for the following photos:
I then used one of my frankens, a dark brown with holo glitter called Stage Whisper, to do a funky french and then sketched spiderwebs with white acrylic ink:
Right hand.
Left hand.
I love how these spiderwebs turned out and I give major kudos to the lovely writer of Nailing This who came up with this technique <3 I've played around with the inks a bit since I discovered this video and will try to post those experiments later, after Halloween. Before then I still have three more Halloween looks to post about so stay tuned!
Sunday, September 9, 2012
Fashion's Night Out Nails
How many of you attended Fashion's Night Out? Did you know that the event isn't only located in NYC? That's right! There are 16+ countries with cities and towns that hold FNO events all over the world! And I'm lucky enough to live in one of those towns! Ok, so it wasn't anything near the extravaganza of NYC but it was still fun and who doesn't love an excuse to dress up?
And of course I had to do something special with my nails! Luckily I had gotten my BOGO promo order from Zoya the week before so I had some new pretties to play around with. I chose Zoya Dakota as a base color. I love how glossy this polish is even without topcoat!
Taken indoors, no flash. 2 coats of polish, no topcoat.
Taken outdoors, 2 coats of polish with topcoat.
Then I used Essie As Good as Gold for a funky french tip:
Taken indoors with flash
And stamped with the same using Cheeky Jumbo Plate H:
Taken indoors with flash.
Taken in full sun
I kind of wish I had stopped there but I had really wanted to use Zoya Katherine also since, you know NYFW 2012 collection, it was FNO, yada yada yada. Oh well, here's what my nails looked like layered with one coat of Katherine:
Still pretty, but not as blingy as before. So when you make a boo boo what do you do? Add glitter! I used Sonoma Polish Clockwork on the tips to bring that bling feel back:
Ahhhhh! Much better!
And what is FNO without some swag? There were no freebies in town but I did find a store with butter London polishes and 20% off everything in the store!
From Evergreen Pottery
Tramp Stamp and Dodgy Barnett from Macey's
Facinator, scarf and a back-up tin of Smith's Rosebud Salve from The Village Emporium
So how about you? Did any of you have fun during FNO? Tell me all about it!
Thursday, August 30, 2012
Where holo you been all my life?
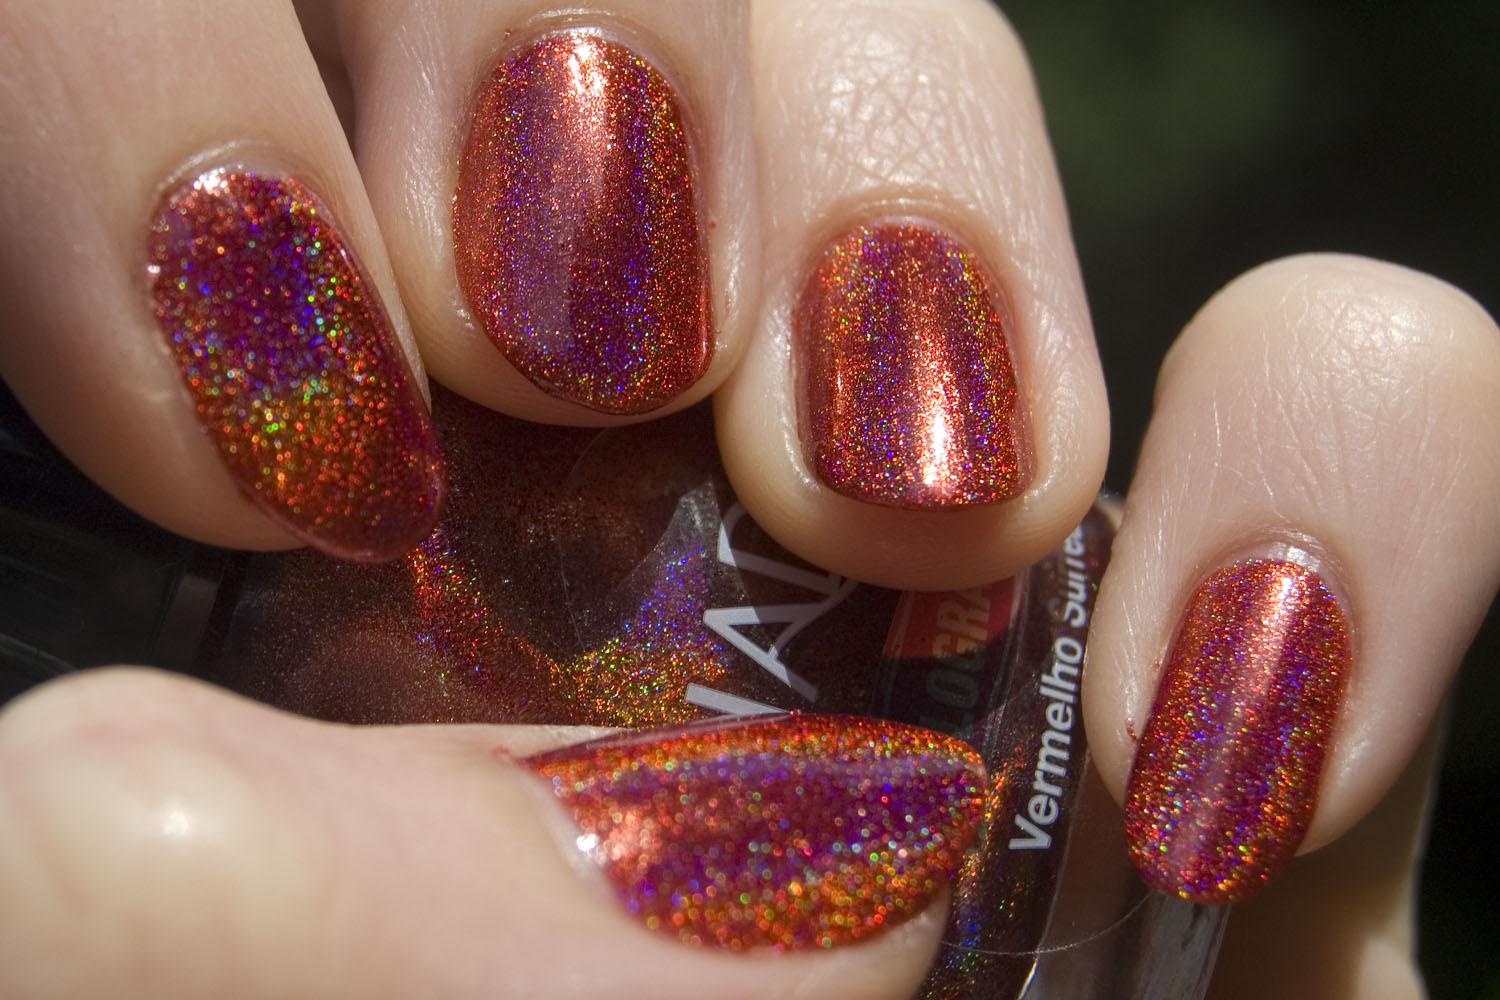
So you know how I mentioned the Jade holos in my last post? Yeah, well, I kinda went and bought two of them not long after. LOL! I bought Magia Negra and Vermehlo Surreal from the lovely ladies at Ninja Polish and let me tell you, these two polishes are GORGEOUS! Better yet, I'll even SHOW you!
First up is Vermehlo Surreal, two coats with top coat, in full sun:
And with a gradient of OPI DS Extravagance on the tips, also full sun:
And Magia Negra, two coats with top coat, taken indoors in full sun:
Some people have said the Jade holos don't play well with base coat or top coat but I had no issues applying them over my usual base of OPI Nail Envy nor any loss of the holographic effect when I put Out the Door top coat over it.
You might be wondering what I did for my second day wearing Magia Negra since, if you've been reading this blog for any amount of time, you know I can never leave a mani alone for the second day.
I decided to layer the two Jades.
That's right, I layered a coat of Vermehlo Surreal over my existing mani of Magia Negra. Then I stamped a small design with Wet'n'Wild Black Creme. Is it as spectacular as it sounds? I'll let you be the judge ;)
And it even matched the dress I wore that day! What a stroke of luck!
First up is Vermehlo Surreal, two coats with top coat, in full sun:
And with a gradient of OPI DS Extravagance on the tips, also full sun:
And Magia Negra, two coats with top coat, taken indoors in full sun:
Some people have said the Jade holos don't play well with base coat or top coat but I had no issues applying them over my usual base of OPI Nail Envy nor any loss of the holographic effect when I put Out the Door top coat over it.
You might be wondering what I did for my second day wearing Magia Negra since, if you've been reading this blog for any amount of time, you know I can never leave a mani alone for the second day.
I decided to layer the two Jades.
That's right, I layered a coat of Vermehlo Surreal over my existing mani of Magia Negra. Then I stamped a small design with Wet'n'Wild Black Creme. Is it as spectacular as it sounds? I'll let you be the judge ;)
And it even matched the dress I wore that day! What a stroke of luck!
Labels:
gradient,
holographic,
Jade,
nail art,
OPI,
polish,
stamping,
swatches,
Wet 'n' Wild
Tuesday, July 10, 2012
Rock Hard
Today I am going to show you my favorite polish for the year 2012. Yes, I know the year isn't anywhere near over yet. But even if the entire Jade holographic collection showed up in my mail box tomorrow this would STILL be my favorite polish of the year. What polish could possibly be that awesome? Answer: Nail-Venturous Lacquers Granite!
This is a white jelly base with white and copper hex glitters and micro black glitters. It applies like butter and I hardly had to do any special glitter placement to get the larger hexes distributed. I put this on and immediately fell in love.
Actually, I fell in love all over again. See, there's a bit of a story about this polish and me.
It started on Facebook.
Amy and I were talking and she showed me and a few other people a photo of one of her newest creations, a white jelly with copper and white hex glitters and micro-fine teal glitter. I said, and I quote, "OMGosh, you need to do this with black glitter instead of the teal! It would look exactly like granite!" She thought it was such a great idea she immediately made and swatched it and showed me the photo.
Love. At. First. Sight.
Of course I had to get a bottle!
And then I HAD to wear it when it got to me!
And then I had another brilliant idea: matte top coat! If my nails resembled a polished counter-top with a glossy top coat then they would look like a water-rounded stone with the matte coat.
Oh. My. Gosh. Fantastic!
And then: nail art!
I'm a bit of a nut for steampunk and I saw someone else do free handed cogs in a manicure so I said to myself, "if she can do it so can I!" And so I did. And I LOVE IT! <3
And of course after seeing these photos all I want to do is use Granite again!
This is a white jelly base with white and copper hex glitters and micro black glitters. It applies like butter and I hardly had to do any special glitter placement to get the larger hexes distributed. I put this on and immediately fell in love.
Actually, I fell in love all over again. See, there's a bit of a story about this polish and me.
It started on Facebook.
Amy and I were talking and she showed me and a few other people a photo of one of her newest creations, a white jelly with copper and white hex glitters and micro-fine teal glitter. I said, and I quote, "OMGosh, you need to do this with black glitter instead of the teal! It would look exactly like granite!" She thought it was such a great idea she immediately made and swatched it and showed me the photo.
Love. At. First. Sight.
Of course I had to get a bottle!
And then I HAD to wear it when it got to me!
And then I had another brilliant idea: matte top coat! If my nails resembled a polished counter-top with a glossy top coat then they would look like a water-rounded stone with the matte coat.
Oh. My. Gosh. Fantastic!
And then: nail art!
I'm a bit of a nut for steampunk and I saw someone else do free handed cogs in a manicure so I said to myself, "if she can do it so can I!" And so I did. And I LOVE IT! <3
And of course after seeing these photos all I want to do is use Granite again!
Subscribe to:
Posts (Atom)